
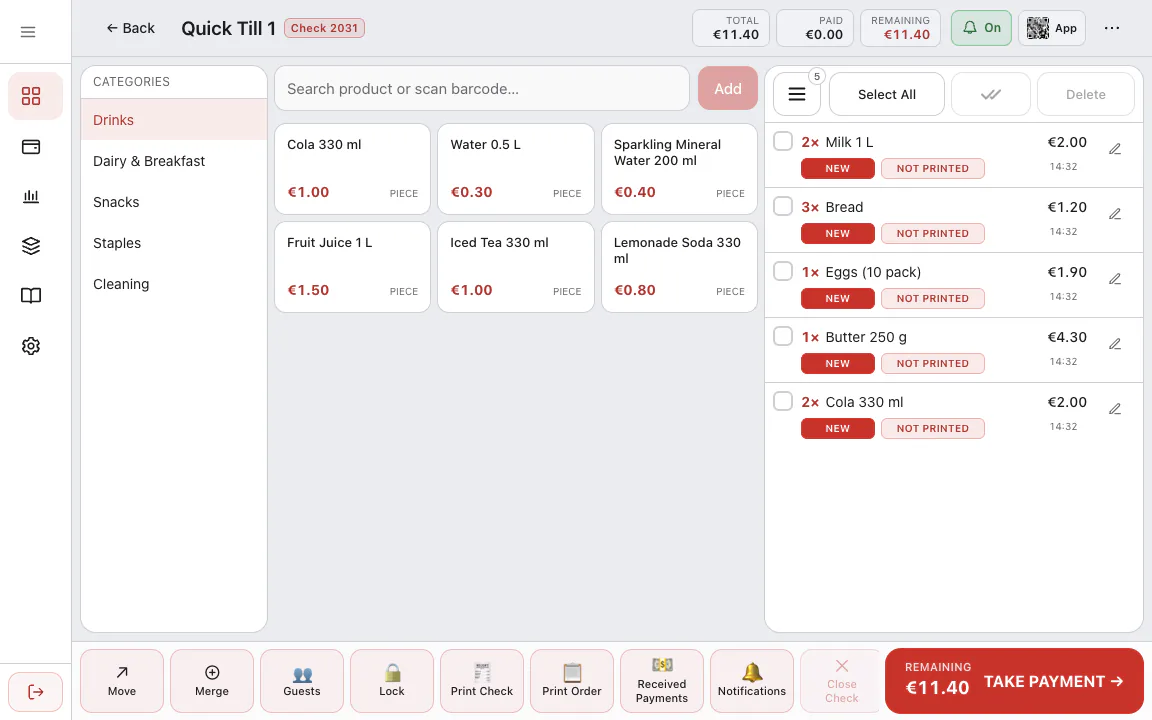
A barcode is the fastest way through the till: you scan instead of searching, and price and stock go to the right product. This article covers the general steps that fit any business. For the catalogue, counts and seasons of a shop or boutique, see the shop and boutique guide; for scales and weighed items, the scale, cash drawer and customer display guide.
Which barcode scanners work?
RoxPos needs no separate driver or setting for the scanner. A USB, wireless or Bluetooth scanner working in keyboard (HID) mode types the code into the box where the cursor is and sends Enter; RoxPos takes the code from there. So the same scanner works with the web panel on a computer and with the RoxPos Pro mobile app on a tablet or phone.
If you have no scanner, the camera of a phone or tablet is enough: in RoxPos Pro you scan barcodes with the camera. The web panel has no camera scanning; there you use a scanner or the search box.
Selling by barcode step by step
1. Add barcodes to your products
In Settings ▸ Product Management, type the code from the packaging into the Barcode field of the product card or scan it with the scanner. For many products, use the Excel template in Quick Actions; in the downloaded file barcodes open as text, so leading zeros are not lost. A product that is on an invoice but has no card is created with “+ New product” on the line when you enter stock from the document; the barcode is filled in from the document.
2. Open the quick till
On the Tables & Sales screen, tap Quick Till 1; in a business that serves at tables this tile is called Quick Sale. The cursor sits in the “Search product or scan barcode…” box and returns there after a payment or a pop-up, so the scanner is always ready.
3. Scan the products
The scanner types the code into the box and the product is added to the basket straight away. An exact barcode match is looked for first; if the product list is loaded, the code is found without a trip to the server. With very fast scans in a row, two codes never merge and none is lost; products are added in the order scanned. A product without a barcode is picked from its category or found by typing its name in the same box.
4. Scan with the phone camera
Without a scanner, tap the camera button in the barcode bar of the RoxPos Pro mobile app. In fast mode the camera stays open where the product list was and every product you scan goes into the basket; you feel a short vibration on each read and hear a beep when the product is found. The camera only opens when you tap the button.
5. Take the payment
Tap Take Payment and choose cash, card or a payment type you have defined. You can split the amount or put part of it on the customer's account. The quick till closes by itself after payment and is ready for the next customer.
When a scanned product is not found
If the code matches no product, the screen shows “No matching product or barcode” together with the scanned code. Check these in order:
- Is the barcode on the product card? If not, add it in Product Management; the next scan finds the product directly.
- Is the same barcode on two products? Then a warning appears and you are asked to pick the product from the list; keep barcodes unique on product cards.
- Is the product or its category inactive? Products of an inactive category do not appear in the sales search or in barcode scanning. You find a deactivated product with the “Inactive” filter in Product Management and put it back on sale with the Active switch.
- Is the cursor in the box? The scanner types wherever the cursor is; click or tap the box once.
Camera scanning: Normal and Fast
In RoxPos Pro you choose one of two modes under View Settings ▸ Camera scanning on the order screen:
- Normal: the camera closes after each scan; useful when you want to check each product.
- Fast: the camera stays open where the product list was and every product you scan goes into the basket. The same barcode is not counted again while it stays in the frame; press “+1” for one more of the same product. After 2 minutes without a scan the camera pauses and resumes when you tap; on a dim shelf you turn on the flashlight.
Each read gives a short vibration, a beep when the product is found and a different alert tone when it is not. The sound follows the phone's silent switch and does not stop music that is playing. When you use a scanner, the sound comes from the scanner itself.
Weighed items
For a product sold by kilo, gram or litre, the unit is chosen on the product card. Tap that product at the till and you are asked for the quantity; with a scale connected, the weight is read through RoxPos Print Agent and the amount is calculated from the unit price. The scale is switched on under Settings ▸ General Settings ▸ Hardware and peripherals ▸ Scale; without a scale you type the quantity. Weighed items and barcoded shelf items go into the same basket. The setup steps are on the scale and weighing support page.
Barcodes beyond the till
- Goods in: in Stock ▸ Stock Movement you add lines with the Barcode tab. A barcode scan does not add a single unit to a line in a purchase unit such as a case; a separate line in the base unit is opened.
- Counts: in Stock Movement ▸ Count, each scan adds the quantity entered, or 1 if it is empty. On mobile, “Scan with camera” reads continuously; the same barcode is not counted again within 1.5 seconds.
- Stock search: the Critical Stock and Current Stock tables in Stock ▸ Dashboard can be searched by product name or barcode.
Quick tills and camera scanning are summed up on the barcode quick sale page. If you are opening a new account, setup by business type explains how choosing your type prepares the screens.